So I got a Premium Spotify account after I updated to lollipop on my phone and found out i couldn’t use Pandora Patcher anymore. While reading around, I came across this comment of someone saying they would rather pay for Spotify than have a hacked pandora app. I thought sure let’s try it, so far I think homeboy is right.
Here is a playlist I have been working on. It pretty much sums up my musical tastes.
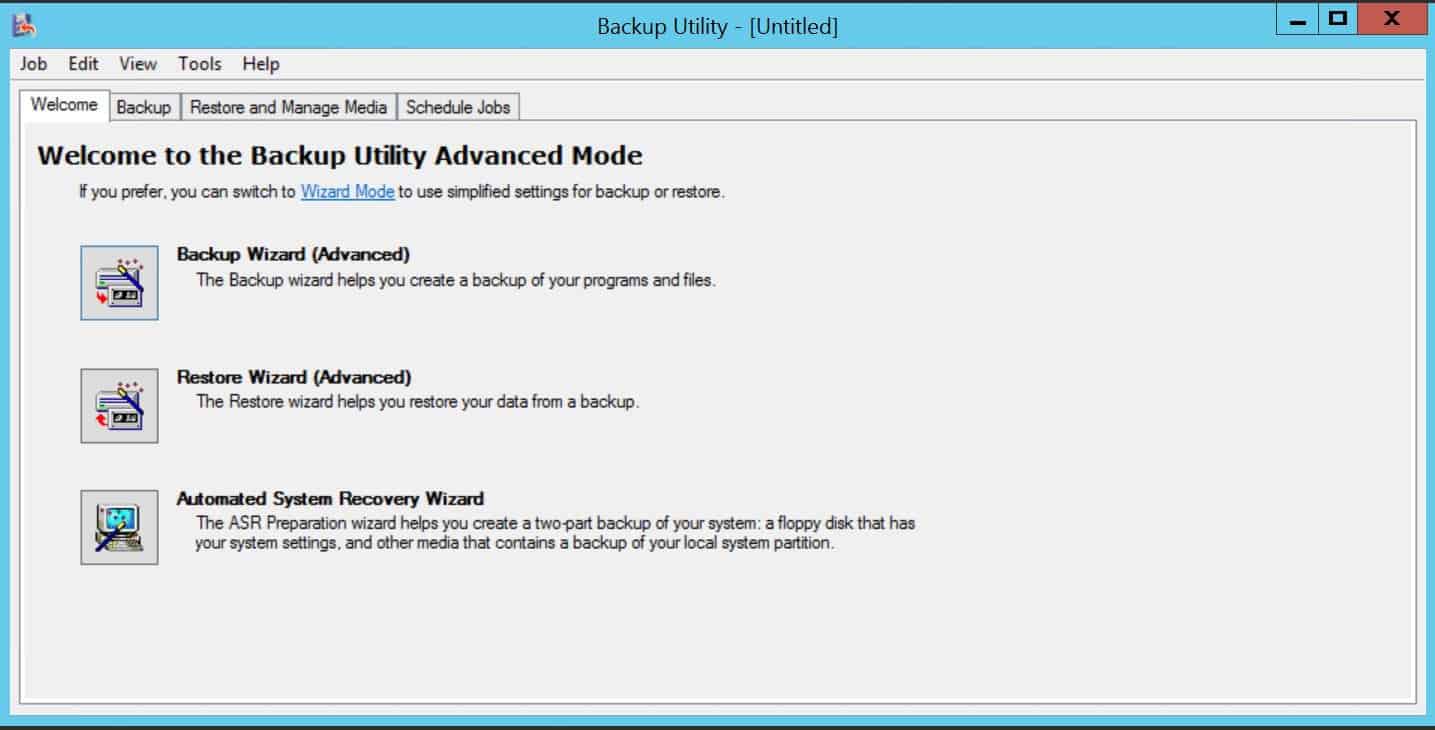
This blog has moved around a little bit. From being on a physical box, to a different physical box, then being P2Ved, and finally for now it’s on a 2012 R2 VM. For most of its life it has had Win 2k3 for its OS. When it came time to restoring .bkf files to Server 2008 and 2012 that i had made using NTbackup, it was nowhere to be found. I guess could have just copy and pasted the data over, but i like to make things harder for myself. Server 2008 and 2012 doesn’t have NTbackup. After some searching the Google I found the solution, it took some digging so I thought I would post it.
If you need to restore a .bkf file to a Windows 2008 or 2012 box and you still have the old 2003 box up. You can just copy the NTbackup files from the 2k3 box to run NTbackup on your new server.
you need to copy over 3 files from C:\Windows\System32:
ntbackup.exe ntmsapi.dll vssapi.dll
After you copy over the files, you can run NTbackup to restore that .bkf 🙂
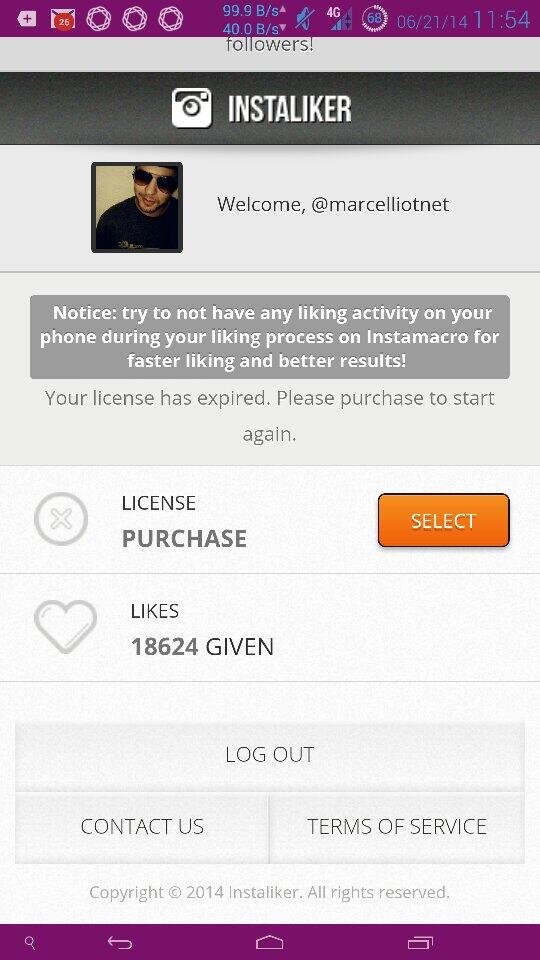
One day I stumbled across Instaliker.net It’s pretty much an Instagram bot that takes over your account, which you configure it with hashtags for the bot to go out and find pictures and profiles based on those tags. The site came with a free 3 hour trial, so i thought i would be it a shot. Just in those three hours, I think i gained 100 something followers and 500 likes. Then again my bot did go out and like probably 1500 pictures and followed maybe 600 accounts.
Instaliker.net came with different packages for how long you could rent the bots for. I choose 10 days for like 25 bucks I think. There is different settings of how aggressive the bot will work. I kept it about medium, but my phone started blowing up. I could hardy use it with all the instagram notifications I kept getting. By the end with the first night with the bot, I think I had around 300 new followers and 1500 liked photos, but i followed around 2000. Needless to say after all this was over my instagram account was filled with crap. I downloaded justUnfollow and used that to help me clean up my IG account. After the time with the bot ran out I had about 2300 follows but i followed 6500 or whatever the max is that intsagram allows you to follow. Then I needed clean up my account really bad. I was following shit and did not enjoy looking at my instagram anymore. I pretty much just used JustUnfollow to unfollow everyone that wasn’t following back and i would manually unfollow peoples with crappy pictures, mostly dudes with creepy selfies.
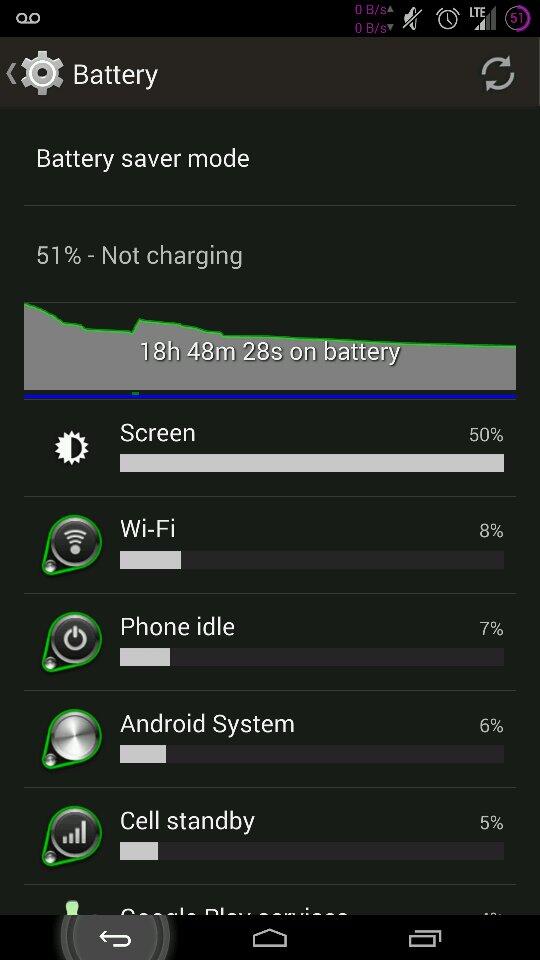
All in all, after I cleaned my up account i’m now following 1085 and have 1947 followers. For a normal person like me, I would not recommend doing this. If you have a company or trying to self promote then go for it, its a helpful tool of trying to get out there. It just drains the shit out of your battery with all the notifications you keep getting. Famous people must just have to turn those shits off.
I first got into bitcoin at the end of March 2013 after news broke about the people of Cyprus putting their money in bitcoin at the threat of bank bailouts. Just the thought of that alone peaked my interest in bitcoin. If you knew your money wasn’t going to be worth shit how nice would it to be to be able to transfer the “wealth” to a different form of currency and wait for it to all blow over or just use that alternative money. I did hear about bitcoin before that but i guess i never really thought much of it. I guess it was chilling at like $34 before the Cyprus thing. Maybe I never thought it would be applied to the real world, it would be to hard to easily use.
I hit the google searching everything i could find on bitcoin. Figured out it was pretty much to late in the game for me to get into mining. I just didn’t wanna invest into a couple grand worth of hardware and higher electric bills. So I thought I would just buy them bit by bit, ha ha. During my research into bitcoin I also learned you could play poker with bitcoins online. I was glad to hear that even though I don’t really trust gambling online. I would keep it small and i really wasn’t doing to bad. But enough with poker. Around about July of 2013 I had a little over 5 bitcoins and i think they were at about $95. I wasn’t doing much with them, just sitting on them and playing poker, hoping I would wake up one day and one bitcoin would be worth a million dollars. That summer though I lost my job and I slowly had to sell my bitcoins, then that one day kinda but not really came. Bitcoin hit $1,000. I remember being so mad that i just had 5 of these things. I could have really used that five grand at the time lol.
Well anyways, things are better now and I have half of a bitcoin at this time. I’m still into bitcoin because I believe the world needs it. Anybody in the world can get a bitcoin wallet and send money to a bitcoin address and you don’t need an ID. I can send bitcoin to China to get my reseach chemicals instead of Western Union-ing American dollars in 4 different $900 sums, haha j/k. You know it only costs $14 to send money to China, it’s like that for a reason…Bitcoin helps put the power back in the hands of the people! and i’m out….*drops mic*
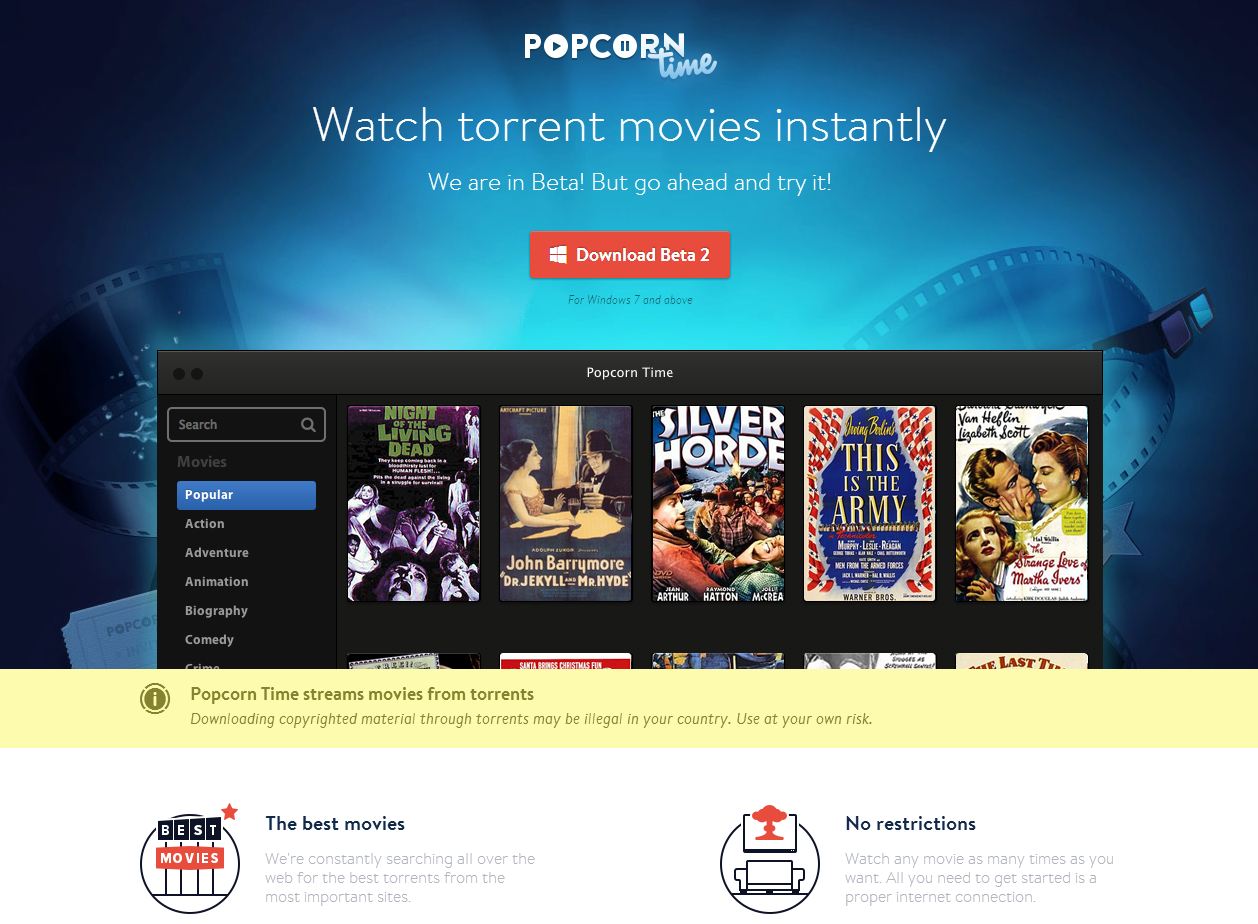
I haven’t been blogging much so I thought I would take the time to write about Popcorn Time. Popcorn Time is an app available for windows, mac, and linux that allows you to stream movies from torrents! You can give it a try at getpopcornti.me I tried it out yesterday and was really impressed. It is in beta so im sure they will be making changes to it frequently.
Yesterday I picked up a Nexus 5 and while at work today, I rooted it, installed ClockworkMod recovery, and flashed it with the Beanstalk rom and Chaos kernel. So far i’m liking it, and i thought I would write a little something.
Then all you need to do to unlock and root your phone, is to put your phone in fastboot mode and run the CF-Auto-Root-hammerhead-hammerhead-nexus5 exploit. To put your phone in fastboot mode. You just need to power it off. Then while powered off hold down the down volume key and the power button at the same time. After in fastboot mode run the .bat file.
That’s it! your phone now is unlocked and rooted. Now if you want to install custom roms, you will need to flash it with ClockworkMod.
install the minimal_adb_fastboot to your computer. Then download the ClockworkMod recovery image. Place it in the C:\Program Files (x86)\Minimal ADB and Fastboot directory. Put your phone in fastboot mode again then run “fastboot flash recovery recovery.img” from the command prompt.
Once you have the recovery flashed you can start downloading custom roms and kernels. Here is a Chaos Kernel for you to try. Chaos-Kernel_v8.1 I would recommend going to xda for downloading custom roms.
If you follow me on Twitter you might have noticed Instagram pictures in my Twitter feed. This is possible with ifttt.com. It’s a site were you make “recipes”. Like in this example if I post a photo to Tumblr it posts to my Twitter. If you have a Tumblr you might want to start another one just for this. I didn’t have a Tumblr before this, so all I use it for is getting Instagrams to my Twitter.
After you sign up for an account with ifttt.com you can either create the same recipes as in the screenshot or search for it. You have to authorize both your Tumblr and Twitter accounts. Then in Instagram on your phone make sure you can post to your Tumblr account, and that’s it. Once you take and picture with Instagram and post it to Tumblr, Ifttt.com checks if any recipes have been matched then posts your Tumblr photo as a pic on twitter, not just as a link to instagram.
A couple of days ago I upgraded my wordpress from 3.5.1 to 3.5.2. After the upgrade I wasn’t able to log back into the admin page. I just now got it back to working status. I found a post on the wordpress.org forum that helped me out. Thank you ahiddleston.
– V3.5.2 seemed to update okay but I was kicked out of the dashboard right after it finished patching
– could not get back in
– noticed the 404 URL string was referencing “wp-admin/upgrade.php” could not be found
– copied in a new and fresh upgrade.php file
– WordPress prompted that the DB was out of date and need patching
Installed iOS 7 Beta on my 4s today. It is a little buggy but I think im going keep using it. Some of the bugs I have noticed are: when opening apps they don’t line up with the screen until they fully open. Kik messenger won’t open. In instagram sometimes the pictures will go black in the news feed. The face on my snapchat icon is missing, weird, but it still works. For the most part it works fine. Hotspot works with usb tethering, the flashlight works, google voice, everything that really matters to me is functional.
I really like the flat UI design, everyone is going with flat so why not apple. I just think flat looks cleaner and I guess so does everyone else. There really isn’t any new features that i have noticed, maybe i should read up on it instead of installing on my phone first :\ but there is a settings control menu you get to by sliding your finger from the bottom to the top. From there you can get to the volume, flashlight, clock, camera, etc. The color scheme changes with the color of your background. For instance if your background is blueish then buttons will be tented blue, if the background is red then the buttons will be tented red, kinda neato. The transitions from app to app and when an app opens is pretty cool yet pretty buggy. I’m sure it will all be running smooth when it is released to the public.
You can install iOS7 beta pretty easily. If you don’t have developers account with apple you can find it on the torrent networks for you device. You will need to be on the latest iOS at first, then just connect your phone to your computer, open itunes, goto the phone section then shift-click on windows or alt-click on mac on the upgrade button and open the iOS7.ipsw file. I have posted a youtube video to follow if you don’t understand my very vague instructions.
Moved our mailboxes off exchange 2007 and into Microsoft’s 365 cloud. My boss hired “office 365 experts”. We have multiple email domains in our environment. During the migration some mailboxes synced with errors. We had to get all the sent mail from the old server for the users that still had old account info after the mx switch over. We also used Mail Exclaimer to auto create email signatures for our users, that stopped working, so I had to create them with transports rules. Shared mailboxes imported as user mailboxes. Ya, not a super smooth transition, but most of the mail is there, or the users think it’s all there…
Before I noticed the shared mailbox import issue. The helpers i had already installed all the “shared mailboxes” as second accounts, which makes it harder to manage and takes up a license. The only way to switch user mailboxes to shared is with powershell.
To install powershell and enable it to manage office 365 you will need Microsoft Online Services Module for Windows PowerShell installed. That will require Microsoft Online Services Sign-In Assistant, .NET Framework 3.5.1, and as well as PowerShell.
The get the exchange cmdlets open up powershell and run these 5 commands:
You will probably have to do some permissions clean up. I noticed when you add full delegation to someones mailbox or to a shared mail box it automatically appear in there outlook. Changes also take a while to take affect. So far my over all experience with 365 is kinda negative, maybe it will change after i get used to it :\
Just upgraded then wrote this. Well I didn’t even know there was an update to 3.5 because usually the dashboard tells you. I guess there is no automatic upgrade. I downloaded the zip from wordpress, and extracted the files. Backed up everything, disabled all my plug-ins, then deleted everything in the root directory except wp-config.php and the wp-content folder. I copied everything over from the zip file except the wp-content folder, and after that I was pretty much done. Just navigated to marcelliot.net/wp-admin/upgrade.php and clicked upgrade. I logged in, enabled all my plug-ins and I was back up. It was pretty damn pain-free, probably took me longer to write this…
At my work we were backing up to a windows server with raid5 configured in the OS. The admin before me for some reason built a box with it’s purpose in mind for doing backups and it doesn’t have hardware raid?! Well I wanted a cooler way of doing backups besides using windows. I couldn’t get a raid controller so I would still have to setup raid with software. I downloaded Freenas, moved about 3.5 TB of data to a backup backup drive, and popped in the burnt ISO. After I setup three 3TB drives with ZFS, I had about 5.8TB of space to work with. I created a windows share for backups and setup rSync on the Freenas box. We have a windows 2008 box that is our file server (no surprise there, at least the raid5 is setup on controller instead of with the OS.) I downloaded DeltaCopy and setup the client part of the software. It schedules a task to run DeltaCopy and I have it configured to run every 2 hours. The first backup took about 3 days, but after that it seems like it takes 5 minutes, because of the way rSync works, or maybe it’s the workers at my work aren’t working cause the files never change.
Sony vsp-ns7 is a digital signage appliance. My work has one, and I was given the task to reprogram it. I have never worked with one of these before. The main reason for this post is the frustration I had just to manage this box. You can NOT have a keyboard plugged into this device or it goes into service mode, which in “service mode” I would think you would be able to make changes to it? but you can’t…
I guess I was bored at work, but when I started at the place I work at now, they had Kayako Fusion installed on a WAMP box running XP sitting on a laptop at the desk I sit at. I built a Proxmox box the other day out of an Acer desktop and I thought “boy wouldn’t it be great if I could move Kayako off that stupid laptop and put it on a VM running Ubuntu?!” So I created a VM and installed Ubuntu, Apache, MySQL, PHP, and SSH. Installed MySQL workbench on my laptop and exported the Kayako database, then grabbed the Kayako web files.
I wanted to have this system running on the least possible memory it could so I uninstalled the GUI from Ubuntu which also forced myself to learn Linux commands better, lol. I used Putty and Filezilla to administer the box. The whole process went pretty well. The only problems I ran into were there were cache files in one of the web files directories that were moved over that need to be deleted. PHP needs to be installed with IMAP and with the mail function, and Setting up the cronjob that uses wget to run a PHP script that fetches the emails and places them in the queue.
I never thought I would ever have an iPhone. I have had an Android Phone since the first Droid came out. I guess I just liked the idea behind Google’s linux-based phone and it’s open-ness. Apple is just so expensive, most of it’s apps cost money, and I didn’t really like how it keeps it products on lock down. Android and even Windows phone have a issue though, they have to run on a variety of different makes and models of hardware, where iOS just has to run on like 3. Apple designing the hardware it’s self and the operating system runs on, has the advantage. iOS is much smoother than Android and crashes much less.
The thing I like more about Android is the apps. I have spent more money on apps for iOS in the 4 weeks than I have ever had owning an Android. Android has a good app for connecting to a uTorrent server. It was very nice to be able to VPN into my home, start a movie download, then be able to watch it when i get home. There is probably an app to connect to uTorrent servers for iOS, but I haven’t found it yet, and when I do find it, it will probably cost money. Tethering, I miss being able to tether off my phone for free, android wins on that one.
I haven’t been able to get hands-on with the GalaxyS3 yet though. I flashed my roommate’s Galaxy Nexus with bugless beast which is on jelly bean and it seemed pretty smooth. I haven’t given up on Android, I just really like this iPhone lol. I’ll give iOS a shot for as long as I have this job, my work gave me an iPhone after I busted my DroidX… :\ I’m just kinda going on a rant about phones because i’m bored, home on a saturday night and I haven’t blogged in almost 2 months. So to finish this, if i could get any phone i wanted in 2013, I would consider getting an iPhone, but I would still probably go google, cause you know the GalaxyS4 is going be awesome. But i’m sure as i get more experienced with the iPhone and an untethered jailbreak comes out for iOS 6, I will like the iPhone more.
I wanted to change the permalinks on my blog for SEO reasons, but when doing so the pages for my posts couldn’t be found. After googling a little bit I found the answer that worked. I’m running my blog on IIS 6.0
On your IIS Server download and install ISAPI_Rewrite Lite. When downloading make sure to use the free Lite version. Install Rewrite Lite, add the ISAPI filter to your IIS Site, by right clicking on your IIS site -> properties -> ISAPI filters tab -> Add … Name the filter whatever you wish and your path to your executable should be: C:\Program Files\Helicon\ISAPI_Rewrite3\ISAPI_Rewrite.dll Click OK on both windows to save your settings. Next navigate to C:\Program Files\Helicon\ISAPI_Rewrite3 Here we will edit httpd.conf Open the httpd.conf file in wordpad and paste in these lines:
Save and exit this file. To complete your IIS changes, Go to start, run and run the command: iisreset /restart Now you should be able to change the permalinks on your wordpress blog for some reason I had to choose custom and place /%postname% in the field to get it to work. Bad thing about changing your permalinks is your tweets, likes, and google+1 counter will reset 🙁
Well I haven’t posted in awhile so I thought I would write about this because I just ran into this issue. I made a new user and mailbox, changed their email address, and that user was not appearing under the global address list but would appear under All Users in the address book. In my case I’m running Exchange 2007 and most of my clients are using Outlook 2010.
Step 1. log into the Exchange Management Shell and run:
Of course change Servername to the real name of your server.
Then Update-GlobalAddressList hit enter, then type the name of the GAL
Step 2. In Outlook manually download the address book by going to: the Send / Receive tab, then click on Send/receive Groups, and in the drop down, click on Download Address Book, then under Information to download, click Full Details. After that the user should now appear in the global address list.
Sipwise’s sip:providerCE v2.6 is a free VoIP solution that works…that’s about it, it doesn’t work great but it does work. It could have been my environment, but I don’t think the setup is anything special. First I installed sip:providerCE virtual image, on to my ESXi box. Log into the VMware console for the newly installed sipwise VM with the username/password of root/sipwise. I just let sipwise grab a DHCP lease, then run ‘ngcpcfg apply’ to generate the configuration files and reboot the server.
After that you should be able to log into the web interface at https://ipaddress:1433 with the username/password of administrator/administrator. You will then need to create a domain i.e. voip.yourdomain.com this can be an IP address as well. After that you will need to create a user, [email protected] and give that user a password. That’s pretty much it on the server side.
Now we need a client for Windows/OSX/Linux I used Jitsi, it’s kinda slow, but that’s what the guide I followed used so…but install the client and when it pops up to create an account click on Use online provisioning link at the bottom of the window. Check the Enable provisioning check box, select Manually specify a provisioning URI and put the following URL there, with only the IP address part changed to reflect your IP or domain name (make sure to leave the rest intact exactly as shown here):
Close Jitsi and reopen it, and it should ask you for a username/password, after you log in you will need to go to Tools, Options, In the Accounts tab select the SIP account it created for you and click the Edit button at the bottom. In the Presence tab un-check the Use SIP Credentials check box and manually enter your username and password or close and reopen the app.
The Android client I used was CSipSimple which was very easy to setup, just create a basic account, give it a name, put in your username/password and server address.
If your going to be connecting to this from the internet you need to port forward https and UDP 5060/5061 to the SIPwise server.
Links below are to download the VM image and the blog post I followed. SIPwise Blog VMware Image
I had to install this remote access card into one of my clients servers. The documentation was pretty straight forward, boot off install CD and run IPMICFG.exe to configure, except when you boot of the CD and it’s doesn’t recognize your CD drive. Called support, no help, the guy thought I was an idiot, and I hung up on him. If i booted the iso image in a VM, IPMICFG.exe ran fine, so I was in a little bit of a pickle. My solution was to make a bootable DOS USB drive and put IPMICFG.exe on it. Booted off the USB drive, and was able to configure the card with no problem.
The other day I had to swap out one of my client’s old access point with this Engenius ECB9500. By default it is configured as a wireless bridge and has an IP of 192.168.1.2. I log into it change the IP to be on the client’s subnet, change it from wireless bridge mode to access point mode, then it disappears…I can’t connect to it at the IP I changed it to, I can’t connect to it on it’s default IP, nothing. I thought maybe after i changed it to access point mode maybe it defaults to DHCP, nope. I read the admin guide, nothing helpful. Maybe its a browser issue, nope. I’m just going to cut my rant short and tell you when you change it to access point mode it defaults to 192.168.1.1 it took me a hour to figure that out only have finally noticing in firefox’s status bar that it was trying to connect to that address after i changed it to AP mode. Hey Engenius it was genius that you didn’t include that in the admin guide.
There is a bunch of posts out there on how to root your Droid X then put Ice Cream Sandwich on it, so I just consolidated the info. The Zip file below contains everything you need. Just download the zip and follow my steps and your Droid X will be rooted and have 4.0.3! Oh this is just for phones that are on gingerbread, and with PCs with 32-bit Windows, sorry Linux, and OSX people.
1. On your droid enable USB debugging and installing apk other than market. 2. Install Motohelper Drivers and root tool on your PC. 3. Plug in your phone to the computer and make sure it’s on charge only. 4. Run the root tool, and it will do it’s magic, I think your phone should reboot 3 times. 5. Now your rooted! 6. Transfer the bootstrapper .apk, the gapps.zip and the ICS.zip to your SD card on your phone. 7. Install the bootstrapper.apk on your phone. 8. Open bootstrapper, Flash recovery, then boot to recovery. 9. Your phone now should reboot into recovery. 10. Wipe data and cache. 11. Install zip from SD card and choose the ICS.zip first 12. Then install the gapps.zip the same way. 13. Reboot the phone.
I know the instructions are kinda vague, but if you google the step your stuck on you will find more than your answer. You can also leave a comment as well. Hope this helps 🙂
Oh and sorry about the slow download, my upload speeds are terrible.
Pinstagram is a Pinterest-like web-based application for Instagram. Ever since I have discovered it, I have had a tab dedicated to the site. You can pin your friends images to your Pinterest page, or like and comment as you would on your iPhone/Android Instagram app. Check it out, it’s a time killer.
I used to use PDAnet before wireless tethering apps, but then Verizon had to start blocking tethering if you weren’t paying for it, so back to PDAnet I went. The newest version 3.50 has a wireless tether option, but I didn’t even try it because I read it didn’t work and only USB tethering would bypass the Verizon block page. PDAnet works with 2 pieces the app that you install on your phone, rather it be an Android, iPhone, or Blackberry. You then into install an app on your MAC or PC, no linux as of yet 🙁 this connects your computer to your phone’s internet connection.
This article is going to assume that you know a little bit about VPNs and both devices. I know more about the Sonicwalls than i do the Ciscos so I pretty much just run the VPN wizard on the Cisco and change the default settings on the Sonicwall to get the tunnel up.
We’ll configure the Sonicwall first. Here give the tunnel a name, put in the DNS name or IP address of the other side, make up a PSK, and where it says Peer IKE ID put in the Cisco’s LAN IP address.
I have the Cisco behind another Sonicwall so the exchange to set to aggressive, on the Cisco I think the Wizard sets the Exchange to aggressive mode by default, so one less change I had to make on the Cisco. Phase1 is changed to AES-128, SHA1 and a lifetime 86400sec (8 hours). Phase2 is ESP, AES-128, SHA1, and lifetime changed to 86400. I’m sure the tunnel would still come up if you kept the encryption at 3DES, but AES-128 is stronger, and I heard it has less overhead.
I skip the network tab, I’m not going over how to create address objects/groups, but all you do is put in the local and remote LAN networks. On the advanced tab I cleared out keep alive because other firewall is behind another firewall that is NATting so it will have to bring up the tunnel.
Um ya here is a shot of the main page of the 5505, yaaa..I ran the wizard. :b
Here I just change the remote to a group of the two DMZs on the other side.
Here I enabled NAT traversal, cause once again the Cisco is behind a other firewall that is NATting. Also here is where you would change the IKE negotiation mode (called Exchange on the Sonicwall) to main.
Ping across the tunnel from the Cisco side and with any luck you will have a fully operational IPsec PSK VPN tunnel. 🙂
Update: I found this video when seeing how my page was ranking in search engines which is doing very poor, ha but I thought the video might help.
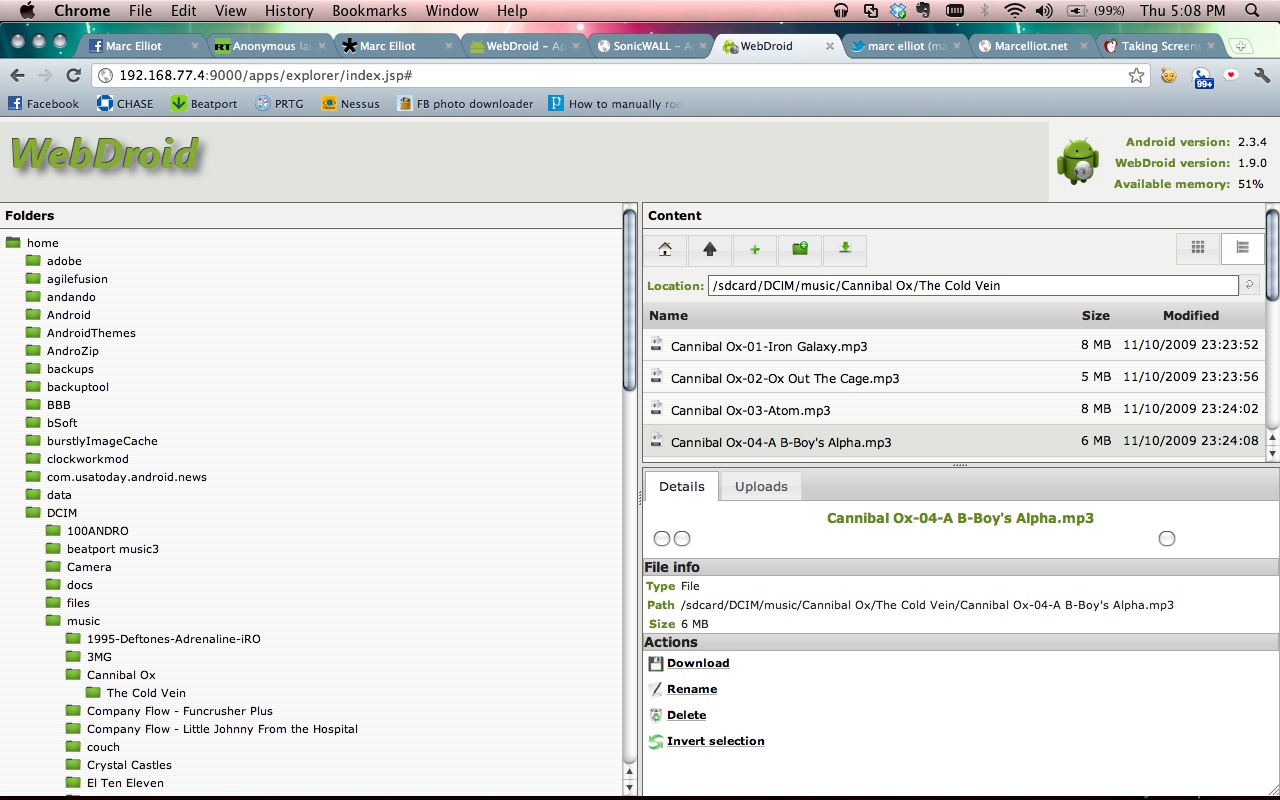
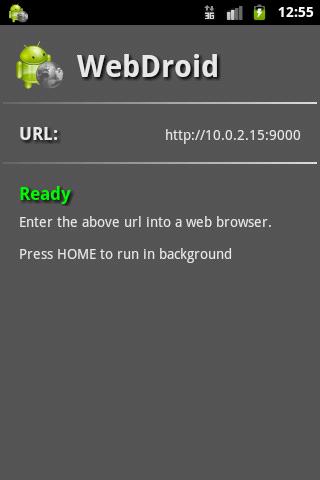
WebDroid is a web server on your Android phone. It allows you to access your phone’s file system from any web broswer over a wi-fi network. It have options for changing the server port and the ability to set a password. I have tried other apps like this in the past but I seem to lke this one the best.
I found myself in a sticky situation and without a phone. Needing a phone quick I went to Cricket and got the cheapest Android phone I could get, which was the ZTE Score. After purchasing the phone I came to realize that you couldn’t download Google Voice from the market. 🙁 I don’t know why you couldn’t, and I didn’t really care to find out why, all I know is that i needed to find google voice somewhere. A quick search found it somewhere on a file sharing site. I downloaded this first one, and after installing it, the icon looked different and after launching it, it was asking me for my gmail account and password..woah, that’s not right. Soo I exited that will quick and searched again and founded a real version.
Now I wanted to root this guy. Seeing that the ZTE Score was not a popular phone and that I’m not very good with ADB or Android in general. The only way I could get it to work was with Zerg’s One Click Permanent Root tool. Which meant I had to use a Windows machine, and mine was all disconnected. After hooking all that back up, I installed the Drivers for the ZTE Score. The Phone must be in Debugging Mode, that is done from the home screen by pressing “menu”—>”Settings”—->Manage Applications—>Development and in there Debugging is an option. I plugged the phone in and ran the ZergRushTempRoot.bat file that was inside the zip file of Zerg’s One Click Permanent Root tool. I watched the console do it’s thing, it said it was successful, restarted, then it was rooted. Blam!
If you want to be really secure now days you need more than just a password. you need another type of authentication. Blood is the best thing to use to authenticate yourself, DNA is like 1,000,000,000x unique. Wouldn’t it be great when your getting money out of the ATM a needle would come out to prick you and take your DNA, not really. Phone factor is a program that calls you on your phone (or text) makes you press # on your phone after you put in your password. So even if the hacktivists steal your username and password and post it on pastebin someone would still need your phone to get in to your playstation account or whatever.
Here I will show you how to setup Phone Factor to call you after you sign in to your VPN. So basically you just install Phone Factor on a box in between the VPN device, In my case a SonicWALL SSL-VPN 200 and the server that authenticates you, in my case a windows 2003 box running IAS.
Here on the VPN device just put in the IP address on the box you installed Phone Factor on. You will have to change the timeout to something higher to give Phone Factor enough time to call you and for you to answer back.
On Phone factor you put in the IP address on the VPN, the shared secret, and the port the VPN uses (1812 for RADIUS).
Then put in the RADIUS servers IP, shared secret, and what port it uses. on the users tab you will enter in the usernames and phone numbers. The free version of phone factor allows 10 users i think.
In the radius server just put in the system’s IP that has phone factor installed on it as the new client and you should be good to go assuming you have the radius box configured correctly. After that you can log in, put in your username/password. you will get a call on your phone telling you to press #, then that’s it your in!
Please do not email me if you having troubles, this is pretty straight forward and the only problem i ran into was the timeout part on the vpn appliance.